| Pos. | Work step |
|---|---|
| 1. | Click with the left mouse button on the FileLinker icon in the right-hand taskbar corner. Tip: Activate the FileLinker system icon permanently in the taskbar corner to have constant access to FileLinker. Win 10: Settings / Personalisation / Taskbar / Info area Win 11: Settings / Personalisation / Taskbar / Overflow in the taskbar corner |
| 2. | Select the command "New project" in the FileLinker menu.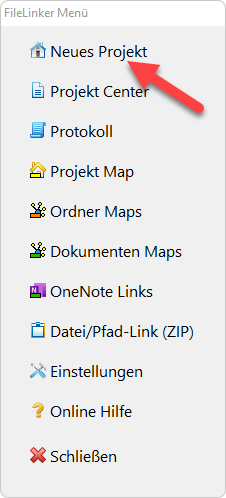 |
| 3. | Enter a name for your project in the "Project name" dialogue box or take the marked folder name from the "Existing project folders" list with the right mouse button. Then click on the "Create new project" button. 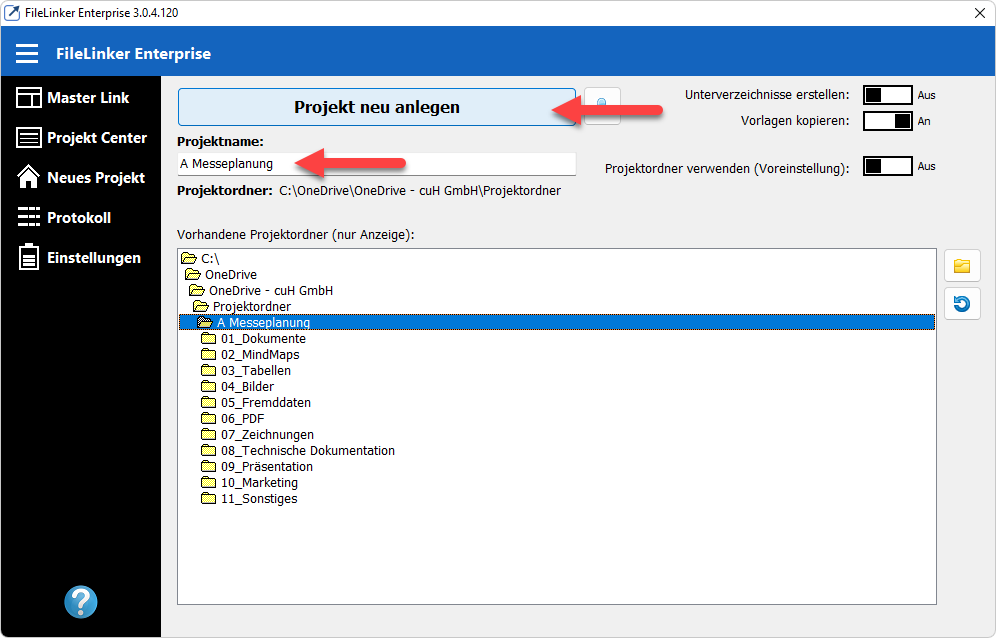 Important: The option "Create project map/link" must be activated in order to generate a project map or a project link. If you have MindManager installed, this option is always available automatically. For links, a link address must be on the clipboard. Further options: Create subdirectories - Switch on this option if the defined subdirectories are to be created in the settings. Copy templates - Switch on this option if existing templates (files) are to be copied. Use project folder (settings) - Switch on this option if the defined project folder in the settings is to be used. |
| 4. | Select a MindMap template in the dialog box and click the "Open" button.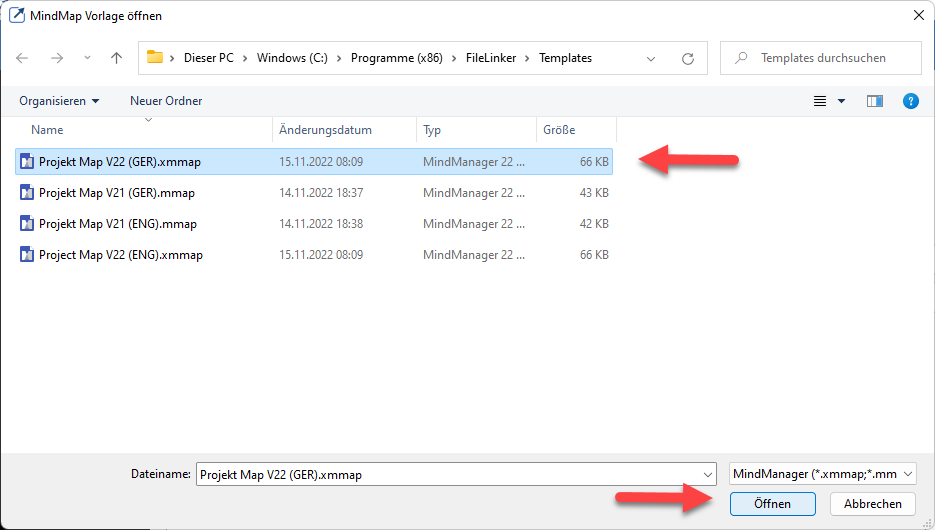 |
| 5. | Only with a MindManager installation: The project map is created in the background and opened with MindManager. 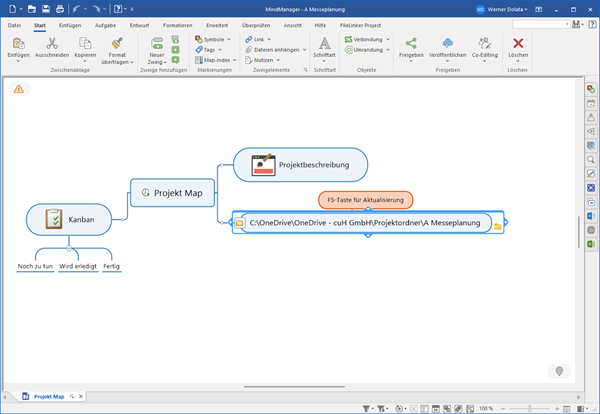 |
| 6. | Only with a MindManager installation: If necessary, highlight the branch with the inserted path and press the F5 key to update the branch. 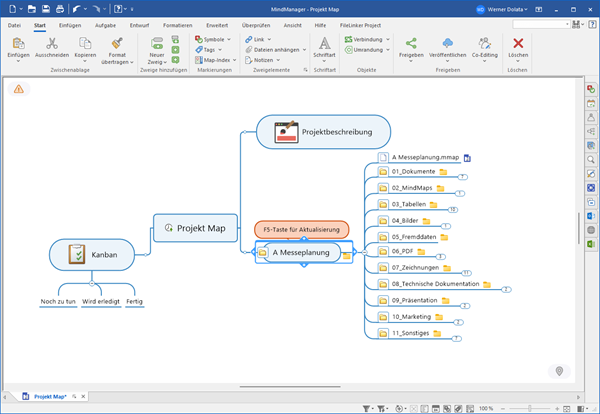 |
| 7. | The folder structure is displayed and you can start entering the project data. |
| Optional: | |
| 8. | After the project has been created, various options are available: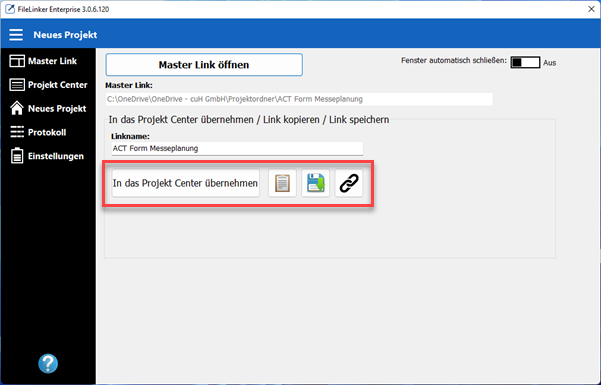 Transfer to the Project Center: Select this menu item if the project link is to be transferred to the FileLinker Project Center. The project link can then be pasted into OneNote or another system. Copy to clipboard: Select this menu item if the project link is to be copied to the clipboard. The project link can then be pasted into OneNote or another system. Save as FileLinker file: Select this menu item if the project link is to be saved as a FileLinker file. Copy link address to clipboard: Copies the link address to the clipboard. This link is only temporary and is useful for working with MindManager in certain cases. |
| Hint | For more information about the FileLinker command scope, see the FileLinker Reference Manual. |
Schnellkontakt: info@filelinkerproject.com

FileLinker
Einfach effektiver arbeiten